Showing posts with label repairs to an old boat. Show all posts

Monday, November 27, 2017

A month of repairs and upgrades


[Hilde’s log]

I keep hoping that David will do a post detailing the repairs and upgrades he has done since we arrived in Pensacola. The list is long! As I am writing this, he is out in the cockpit braving some very cold breezes putting back together the junction box under the cockpit table and polishing the cockpit walls which end up collecting all sorts of black marks as he works on various projects. It’s really cold here in the morning, but fortunately warms right up in the middle of the day.

I helped him a little with servicing our winches. That’s the part of the boat that you wrap the sail sheets (ropes) around to help you pull them in. Sails are really heavy, so help is needed! Our two winches hadn’t been serviced in a long time and were hard to crank. David pulled off the covers and then unscrewed the five 8” bolts that hold the winch to the teak block on the deck. The bolts go through the foot of the winch, through the teak block, and then through the fiberglass deck. Unscrewing them was difficult; even the power screwdriver balked. After he got them off, David cleaned off any corrosion and greased them and reassembled them on the deck. My job was mostly holding the screwdriver against his wrench, or holding the box wrench against his screwdriver. Each of the winches took most of a day to finish.

Starboard winch with its guts exposed. It also got resealed (see white goo around the base).

Rusty bolts (some leakage over time), looking up at the winch base from the quarter berth. One of them broke! We had to get new ones online, as they are a size no one keeps in stock.

The port winch is reached through the port side lazerette, which meant a lot of unnatural bending and stooping to get at the bolts. The starboard winch is reached through the quarter berth and that meant taking everything out while we worked on that set of bolts. The good news is that I was also able to wipe down stowaway dust and clean it up a bit. 

David tucked into the empty quarter berth.

Me wiping down the dust.

What do we store in the quarter berth? All this that is shown filling up the main cabin. Oi.

David also put in a new jiffy reefing system that eliminated long dangling lines that tried to snag on everything and also let us, for the first time, have three working reef points. Sawing off some of the stuff already on the boom in order to attach the reefing rack took about three hours. Fortunately, I was off shopping and didn’t have to listen to the screech of the saw.

Three reefing points!

Jiffy reefing track installed.

The Walker Bay Hyperlon dinghy tube has taken some wear and tear, and David patched that up nicely. The glue that came in the original repair kit committed suicide at some point, but David looked on line and found that the glue he already had (3M 5200) would work nicely. Am happy to report the tube is fixed and firm once again.

Abraded dinghy tube.

One upgrade that made David very happy was convincing our AIS to display on our chart plotter. He also repaired the red and green bow light that went dark during the crossing and replaced the leaking water hose in the engine. Ditto the broken traveler.

It made me happy to note that he restored the gate wires across the access gates (where you get on and off the boat, either side, when you are not tied up to a stubby little finger pier but to an actual dock). It is scary to walk past them when you're at sea and have them be open to the water, even though no one should count on that slender wire to stop a fall. I guess it's mostly psychological.

The gate wire, which gives me a false sense of security.

David breathed life back into the outboard which came awake with a nice loud roar.

He added a red LED in the compass, which was dark the whole way over. Not a huge thing when you have GPS, but still nice to be able to check the heading without a flashlight.

In our mania to redo the teak in the cockpit we forgot to replace the caulking and got good and wet as punishment from King Neptune. The caulking is back in place! Gee, I hate a wet boat.

The toilet sprang a small leak on the passage, and David tightened it back up.

He replaced the night light in the engine water temperature gauge.

He also stripped, cleaned, and lubed the jib sheet foot blocks which eliminated a lot of screeching when handling the jib.

And me? I polished the stainless steel life rails. After all, gotta look shiny. I also administer tea, coffee, meals, and the occasional power bar and herd the laundry to the washing machines. I have my uses.

It's not all banging away on the boat, though. We take a walk almost every day. Here is a little park not too far from us where you can sit and watch nothing happen on the bayou.


We've also hooked up with old friends Sherry, John & Cookie, and Paul, and made new friends, Art & Mary Jane. Thanks to them all for their friendship and for providing lovely reasons to leave the boat and for schlepping us around in search of boat parts. The nicest thing about cruising is the people you get to know. We've also made contact with Gary and Linda, a couple we met two years ago when we sailed on a schooner in Maine who live here in Florida and who we will see when we get to Punta Gorda. Somehow, everyone we know eventually washes up near us.

Current plans are to leave for Punta Gorda around December 1st. Until then, stay warm and stay in touch!

Thursday, March 16, 2017

Ten Years Ago and Right Now

[Hilde's log]

A happy birthday, 10 years ago today.

Ten years ago, on my 55th birthday, I was baking a loaf of bread as we bobbed around in Great Sale Cay in the Abacos, Bahamas. See above photo for proof. This year, I'm not.

This year, I am seven weeks shy of my last day of work (well, of paid work), and am spending a lot of time sorting and tossing my belongings, an activity that seems to be a never-ending pursuit. We are trying to shrink our inventory yet again so David can get all his tools to fit in the smaller of our two storage spaces. The larger one is sort of a “garage” where he does work on the cars and where we have been varnishing the large doors. (see photo) It's a workshop, more than a storage space, but it needs to be shut down before we leave. So...more sorting and tossing. Thankfully, things that were vital to me eight years ago are much less so now, so I have been able to let go of more.

The "workshop" minus cars...varnishing in progress. All that stuff either has to be put on the boat, in our other tiny storage space, or tossed.
I must admit, I had no idea last June that we would still be working on the boat in March, and still working on storage, and still winding up, and still, well, everything. I have some acquaintances at church who were to set sail in February. They were at services last Sunday. I know exactly why, too. Same as us - “one more thing.”

Since the last post, we've had the mast pulled for repairs and upgrades (new radar, a radar “cage” to keep the sails from snagging on the radar, steps for climbing the mast, new spreaders, and a new mast step) and had the boat hauled for a rudder inspection, sea cock replacement, instrument fit, sole repair, and a bottom job. In between those large projects the cabin was full of folded sails and David was beavering away at the instruments and wiring and battery voltmeter. And, of course, the varnish work, which is getting very old.

Raven at Seabrook Shipyard, getting her mast pulled (that huge crane is pulling it up out of the deck).
But as of next Wednesday, Raven will be splashed again, the cabin will be clear of sails, one door and our table will be rehung and the rest of the varnish work will be almost finished. We actually do see the end of this year-long refit approaching. I am admiring the fact that the leaks from the sea cocks are a thing of the past, that the splintered floor is replaced, and that the cabin looks, well, finished. I might start looking for new couch pillows or something. Big shout out of thanks to Stix N Rigging and to Mockingbird Marine, who have done a fabulous job, and to the folks at Seabrook Shipyard, also an excellent group.

Raven "on the hard" at Seabrook Shipyard. Like an iceberg, most of the body of a sailboat is under the water! She looks naked with no mast, no boom, and no sails.
This is an interesting shot. See David's left hand? It's on our very tiny rudder. Note the flat finish of the new bottom paint. Every five years you get to do it again.

So, we're done, right? But, oh, wait, there's the non-skid to be re-done. And the instruments installed. And the solar panels. So it goes.

Still, starting next weekend, I will be hauling everything out of every crevice on board for a deep cleaning (no more construction dust) and yet another sort and throw party. Then we will begin moving back aboard. After we are back aboard, yet another deep cleaning and sort and throw party in the 5th wheel prior to putting it on the market.

At some point in this process we will both be officially retired (!!!) and will move forward more quickly.

Except: the whole process is happening amid the arrival of our first grandchild and requisite trip(s) to Portland, Oregon, and in between all the other financial bits and pieces and medical bits and pieces that must be seen to in conjunction with leaving our pre-retirement lives...but that's okay. It will be on our time, for things that matter to us.

When you want to change your life in a major way, it's always a lot more complicated than you thought, even when you have done it before. But, one step at a time, you get closer and closer and then… then you find yourself baking bread while bobbing at Great Sale Cay.


THIS. Raven underway.

Thursday, January 26, 2017

[Hilde's log]

A neighbor of ours had an interesting experience on her way across the Gulf recently. About 90 miles out, the step on the main mast disintegrated and the mast dropped about two inches into the keel. When the mast goes down, the tension on the standing rigging disappears, and so the base of the mast can move around on the keel. Main masts are big and heavy (ours is a modest 47' tall) so when they come down, they come down with a resounding whump. Fortunately no one was hurt, and she was able to limp back to Kemah using the motor. We found out about all this when she reappeared at Portofino, and David saw her drying out her jib on the berm instead of sending us post cards from Belize.

Neither David nor I had ever heard of a mast step disintegrating. Our neighbor's was made of mild steel, which tends to rot in sea water. Ours is not made of mild steel, but the rigging check showed….a rusted, disintegrating mast step. While it is not in immediate danger of breaking down, there is no way of knowing when it would reach the end of its life. Maybe a year from now? Five years? We decided to get it fixed and have one less thing to worry about. After all, it's reasonable maintenance for a 33 year old boat. Below are some photos that show the problem (and the dirt) and another photo of what a mast step should look like. 

Nasty mess.

Nasty mess #2.

This is what it will look like once replaced.
I am very grateful we were alerted to this problem and had enough sense to follow through with checking it out on Raven. Having the mast collapse in a calm sea is bad enough, but imagine if you had some rough weather, or were too far offshore to motor to port, or it happened at 2 a.m., which is when trouble delights in appearing. I keep this in mind as we write the check for the fix. It is a large check.

We need to schedule boat yard time to fix that problem and to install the various radar, upgrades, etc. that will be on the mast. The good news is, we can do a lot of the prep ourselves which will cut down on labor cost and we can kill two birds with one stone, labor-wise – all the things that need to be added to the mast can be done at one time while the step is being repaired/replaced.

Despite this new issue, things are moving on apace. David has finished one of the new instrument pods, wiring and all. This pod will be mounted vertically beside the helm pedestal for easy viewing (see photo below). There is a second pod in progress which will be mounted at eye level, horizontally, with the GPS, wind speed/heading indicator, etc.


Looks kind of like R2D2.
The main cabin has reverted to being workshop space, but will soon be clear again. David has finished the quarterberth shelves, complete with supports. We are thinking of making the lower portion a sleeping berth for a 3rd person on board. A snug fit, but doable, and nicer than having to share a “hot bunk” with another crewmate.

At the beginning...

Finished! David fits in the space below, so it's a good length for sleeping. Just don't jolt upright in the night!

Looking up to the bottom of the shelves, you can see the supports and bolts to hold the shelves in place.

David has also finished wiring the starboard side with AC voltage, and has moved the battery charger from an inaccessible nook at the back of the quarterberth to a snug home he can easily reach from the deck access hatch. The switch panel was completed earlier in December, but it looks so nice I wanted to post a photo. The first photo below shows the mass of wiring; the one below that shows the finished product. David has spent hours stripping out extraneous wiring from 30 years and two previous owners and is happy that what is left is necessary and neatly laid out, instead of a tangled mess.

The guts of the thing, with wires everywhere. All these wires belong here. Wads of wires that went nowhere have been removed.

Neat and functional! We even have USB ports for the phones!
I keep trying to get David to add some commentary to the log, but he says he's too busy with his projects, so all the technical details will have to wait til he comes up for air.

Friday, January 6, 2017

Baby, it's cold outside....

[Hilde's log]

As I write this, it is cold out there (well, for us) at about 40 with a nasty wind chill. We are still not aboard, which is the good news and the bad news. The bad news is just that we miss being on the boat, which is still under construction, so to speak. The good news is, we are much more comfortable than we would be at the marina. It is not fun to walk to the cars, or to the outside (!) laundry, or to the bath house in cold weather. Not only is it a bit of a hike from our new slip, but we also have to walk past the open water of the Kemah channel, and when the wind blows it's some kind of freezing out there.

December was pretty much of a loss as far as the boat goes. We were both flattened for three weeks with the Great Gulf Coast Plague of 2016. Mine devolved into pneumonia! We are both fine now, but neither of us had any energy for doing anything but being sick for most of the month. The last week we traveled for Christmas and had a wonderful time, but again, not much time for the boat.

Before I was felled by the Plague, I did manage to finish the v-berth and the head. Since I took the photos below, we have put the cushions back in the berth and all doors are installed in the head. Such an improvement! The varnish is 90% finished below decks. I think I am down to a small door, a medium sized door, and two big doors. I'll post another photo when it's all done and liveable.

Before

After

Shiny new head, missing a door which has since been installed

Since we returned from our Christmas travels, David has been at full steam with the remaining repairs/upgrades. One of the huge upgrades is our new instrument array. David just built the new pedestal guard from scratch. Our old one was rusted in too many places and the new ones cost $200! So he built his own – check out the photo below (note the dark...he is working in the dark a lot right now). Next up is installing the new instruments and running wires hither and yon. 

David's new pedestal guard

The revised move-on date, hopefully the last one, is mid to late February. It usually warms up considerably here by that time and usually there is a lot more sun. Fingers crossed.

Monday, August 8, 2016

She's starting to look good!

[Hilde's log]

Fewer than 9 months to go, and we are making good progress. For those of us who like to finish things, it can be pretty frustrating to have everything out all over the place all the time. We are forever hunting this or that thing that has disappeared into the mess. Yesterday I was far enough along to wash and replace items that go in the galley, and that lessened the chaos a bit. I'll let the pictures tell the story.


Portside work station
Starboard settee holding area...also known as the Bermuda triangle
Passageway


The galley is being redone and is serving as a work station at the same time. In the first picture below, you can see the new white walls. They have really lightened the interior. I haven't yet sanded and varnished the dish/spice/paper towel holders yet. As a point of reference, the second photo below is one of the galley "before". The third picture below shows it in use, covered with various half-finished doors.


The NAV station is almost done. There are so many parts to it! On the left is the NAV station locker "before" - icky, that is. On the right is the locker after varnishing the outside and painting the interior bright blue. You can see the contrast in the unfinished area. David is going to re-install my shelves here. It's where I store my galley appliances, like my small crockpot. On the bottom go our work / sailing gloves. Strange bedfellows on a boat abound.


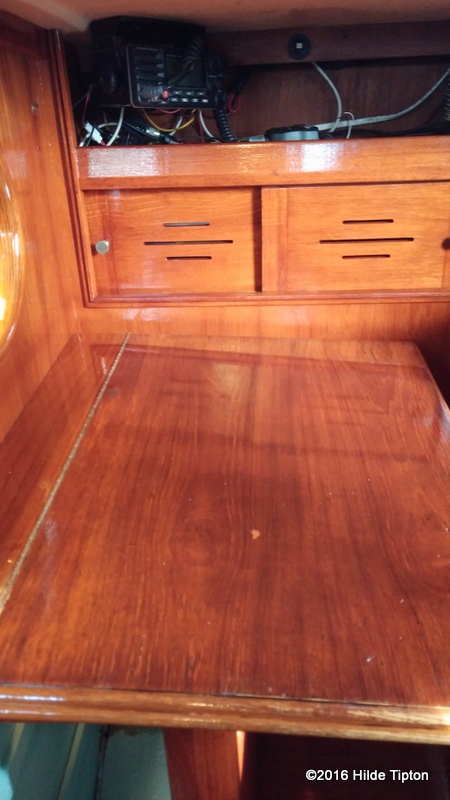
Below is part of the NAV station as it was being stripped. Now look below to see it all shiny with new varnish. Still have to clear out the shelves above and below that hold the radio, binoculars, boat horn, etc.


Above is a glimpse of the worst/best job - fixing up the head. That's the floor. The part that slants up has been painteed. The bottom with the grate has not. You can see what a difference the paint makes! I need to sand and refinish the grate, clean out under it, and then paint the rest of the floor. David did most of the head lockers (my arms aren't long enough to reach the back) as well as the main cabin locker and the v-berth locker. As you can imagine, the whole boat reeks of paint.

And we're also getting around to the trim on the outside! I use the royal "we" here - this is all David's doing. It took days of sanding to get the coaming clear of dirt, old varnish, stains, etc. This is two coats of Cetol clear (no color). Only 8 more to go. It's quite the challenge in this heat. He got it all ready and then had to wait a week for the random rain showers to disappear. Then it got so hot he could only put on the varnish in the morning after the dew had dried. Short time window. You can see the contrast with the toerail below.


I sincerely hope the next post will show everything DONE and us moved in. David says September 1. I'm more inclined to say October 1. I hope he is right.


Thursday, February 7, 2008

Engineering Log - Vero Beach, FL


[Cap'n Dave's log]

Hi! Everyone:

True to its nick name (Velcro Beach), we have been unable to peel ourselves away since arriving here January 4th. Still, why cruise unless one can live without a schedule? We are currently waiting for deliveries of spare parts: new bug screens for the port lights, a seacock maintenance kit, and a special wrench for adjusting the rudder post stuffing box. With luck, they’ll be here soon and we’ll have no more excuses for lingering.

The mooring field here is extremely well protected, so I have had a stable platform for completing some repairs. The engine was weeping diesel fuel from a pipe flange on top of the high pressure injector fuel pump. The gasket had shriveled up with age or, perhaps, a tankful of diesel fuel containing ethanol, which is not friendly to very old gaskets, fuel lines, and tanks. NAPA had some neoprene of the right thickness, so I made a new gasket using the old one as a pattern. Eventually, I chickened out of using my homemade gasket and bought a manufactured one for $1.50, tax included. My homemade gasket will stand by as a spare. So, the diesel leak was taken care of.

During our first week here, I re-plumbed the head. I knew it was going to be a slog and had planned to replace one length of sewer line at a time, so that I could stop at any time and the head would still be operational. Well … the first line, from seacock to vented loop, wouldn’t let go without my raising the vented loop, which required removing another line, from vented loop to the Y-valve. Like dominoes, one fell, then the rest. Before too long I had removed the entire head: outflow pipes, inflow pipes, commode, and all. This job was every bit as ugly as I had expected. Given the potency of the smells, I was very glad that Raven was standing still. It was not the time to succumb to sea sickness.

After thoroughly cleaning the head, the installation of modern, white, plastic hoses was a pleasant task. I moved the Y-valve from the cupboard under the sink to the wall behind the commode. It is much more accessible now and, being closer to the head, will benefit more from the vinegar we use to minimize salt build-up. Also, the run from commode to seacock is about four feet shorter.

When the head was finished, I took several days off. I felt like I had earned a break. With labor costs at $60+ per hour, I knew I had saved us a few hundred bucks.

Another long-postponed job was a major overhaul of the galley range. One of the three top burners would not stay lit when the valve was released after the obligatory warm up period. The manufacturer told me that replacement burner (thermocouple) parts were no longer available. Instead, I’d have to purchase retrofit kits for the two small and one large burners. The prices were reasonable, particularly when compared to $1500 for a new stove. The installation was straightforward but after a couple of days one of the burner control valves began to leak and I had to order a new one. That’s the way it goes.

Dirty gasoline continues to haunt the Honda generator and outboard. Both would stall unless I applied half choke. Not wanting to be stranded in the dinghy, I once again rebuilt the carburetor on the outboard, this time removing and cleaning the jet. The fuel tank appeared clean but the inline filter was dirty. This motor now runs well,

Cleaning the fuel system of the Honda generator was educational. Indeed, the fuel tank was dirty, as was the inline filter. Getting to these parts required splitting the clamshell case. At one point I wondered if I’d be able to get it all back together. I did, and there are only two parts left over. Clearly, they are not critical as the generator now runs just fine.

I have been testing a fiberglass polish made by Starbrite. It appears to work well. Two applications are recommended, followed by a pure polish. I found it best to apply liberal amounts of polish with a rag, spreading it with light pressure. I let the polish do the work, allowing enough time for the solvents to soften the surface film. There appears to be no abrasive paste in this product, which makes me happy. After I removed the dried haze with a second rag, the chalkiness was gone and I could see the beginnings of a nice shine. I am encouraged to continue the process.

Other cruisers tell similar stories of non-stop repairs and maintenance. Someone remarked, “While you’re sleeping, your boat is falling apart.” Work on board is never finished. I have four lists of jobs: (A) broke, (B) almost broke, (C) routine maintenance, and (D) a wish list. My spirit dictates what gets done first, so the lists help match my mood to the work. This is the best way I know to minimize my resentments around what appears to be a non-stop battle with entropy. Even so, I much prefer working on this boat than doing similar work on a house or car. A common definition of cruising is “working on your boat in exotic locations”. The hardest job is to keep moving towards those exotic locations.

Best regards,
Captain Dave